Source(Google.com.pk)
With summer just around the corner, your clients will no doubt be requesting all of the fun sunshiny colours for their mani. From a twist on a half-moon colour-block to playful flowers, Bio Sculpture shows you how to get three brag-worthy looks with their summer Carnival collection.
Gels & Tools Used: Base Gel, Soft Gel, Hard/Medium Gel, Colour Gels #1, 106, 172, 173, 175, Gloss Gel, Upper Arch Brush, #17 Deluxe Nail Art Brush, Dotting Tool.
1. On a prepared nail, apply a layer of Base Gel. Cure.
2. Draw a half moon shape with colour gel #175 Havana Nights, cure and repeat.
3. Draw another half moon shape towards the opposite side with colour gel #173 Ipanema Sunset, cure and repeat.
4. Apply colour gel #1 French White in the remaining centre section and cure.
5. Apply a second layer of #1 French White. Do not cure.
6. Using a dotting tool and colour gel #172 Favela Sunrise create dots in the white gel, cure.
7. Add silver glitter or colour gel #106 to the white gel cure.
8. Create Upper Arch with Hard Gel or Medium Gel, cure.
9. Apply final layer of Gloss Gel, cure.
Gels & Tools Used: Base Gel, Soft Gel, Hard/Medium Gel, Colour Gels #1, 175, 2017, Gloss Gel, Upper Arch Brush, #17 Deluxe Nail Art Brush.
1. On a prepared nail, apply layer of Base Gel, cure.
2. Apply a layer of colour gel #1 French White, cure
3. Apply second layer of colour gel #1, do not cure.
4. Randomly dot uneven droplets of colour gels #2017 Liquorice, #175 Havana Nights and #1 French White, do not cure.
5. Sprinkle a tiny amount of glitter onto wet gel.
6. Using a metal pick or clean dry deluxe nail art brush drag the gel droplets in circular and half circular motions across the nail surface to obtain a marbling pattern. Cure
7. Create Upper Arch with Hard Gel or Medium Gel, cure.
8. Apply final layer of Gloss Gel, cure.
Gels & Tools Used: Base Gel, Soft Gel, Hard/Medium Gel, Colour Gels #1, 172, 174, 175, Gloss Gel, Upper Arch Brush, #17 Deluxe Nail Art Brush, Gems, Feather, Dotting Tool.
1. On a prepared nail, apply layer of Base Gel, cure.
2. Apply colour gel #172 Favela Sunrise half way up the nail from the cuticle, cure and repeat.
3. Apply colour gel #175 Havana Nights onto the free edge side of the nail, cure and repeat.
4. Apply a thin layer of Soft Gel over the entire nail, do not cure.
5. Place 3 circles of 5 white dots each onto wet gel. Place smaller dots with colour gel #175 and #174 into the centre of the white dots, do not cure.
6. Drag the centre of the dots inward using the tip of an Upper Arch Brush to create flower petals. Do not cure.
7. Place gems in the centre of each flower.
8. Using a dotting tool create lines of dots using colour gel #1 French White, cure.
9. Create Upper Arch with Hard Gel or Medium Gel, cure.
10. Apply final layer of Gloss Gel, cure.
Optional Feather can be added by using a droplet of Hard Gel after nail is completed.
What you’ll need: Weekly Top Coat, Vinylux in Cerulean Sea and Electric Orange, Aqua Blue AB Transfer Foil
1. Prepare the natural nail to ensure the nail is thoroughly cleansed. This includes performing the manicure, eliminating surface containments and purifying nail plate.
2. Apply two thin layers of VINYLUX Electric Orange to entire nail.
3. Apply one thin layer of CND VINYLUX Cerulean Sea in a chevron shape down the centre of the nail.
4. Press the Aqua Blue AB transfer foil over the Cerulean Sea.
5. Apply a thin layer of VINYLUX Weekly Top Coat.
What you’ll need: Weekly Top Coat, Vinylux in Bicycle Yellow, Electric Orange and Lush Tropics, Additives in Sizzling Sand, Fine Art Brush #3, Nourishing Remover
1. Prepare the natural nail to ensure the nail is thoroughly cleansed. This includes performing the manicure, eliminating surface containments and purifying nail plate.
2. Apply two thin layers of VINYLUX Bicycle Yellow to entire nail.
3. Place a drop each of VINYLUX Electric Orange and Lush Tropics on a clean surface, and use a fine art brush create your design. Be sure to clean your brush in between colours with Nourishing Remover.
4. Apply VINYLUX Lush Tropics in small strokes towards the center of the nail.
5. Apply VINYLUX Electric Orange in small strokes towards the center of the nail.
6. Use the same clean fine art brush to apply Additives in Sizzling Sand to the design while still tacky.
7. Apply a thin layer of VINYLUX Weekly Top Coat.
What you’ll need: Weekly Top Coat, Vinylux in Bicycle Yellow and Lush Tropics, Fan Brush, Detailing Brush, small craft gems
1. Prepare the natural nail to ensure the nail is thoroughly cleansed. This includes performing the manicure, eliminating surface containments and purifying nail plate.
2. Apply two thin layers of VINYLUX Bicycle Yellow to entire nail.
3. Dip the tip of a fan brush into VINYLUX Lush Tropics and brush over the nail starting from the bottom left, brushing up towards the cuticle. Repeat on the right side of the nail.
4. Apply a thin layer of VINYLUX Weekly Top Coat.
5. Use tweezers to apply small gems in a half circle into the wet VINYLUX Weekly Top Coat.
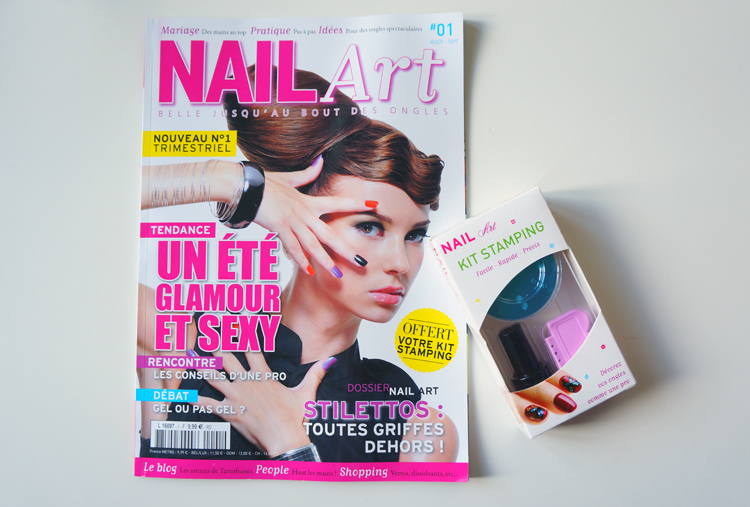
Nail Art Magazine Nail Art Designs 2014 Ideas Images Tutorial Step By Step Flowers Pics Photos Wallpapers

Nail Art Magazine Nail Art Designs 2014 Ideas Images Tutorial Step By Step Flowers Pics Photos Wallpapers

Nail Art Magazine Nail Art Designs 2014 Ideas Images Tutorial Step By Step Flowers Pics Photos Wallpapers

Nail Art Magazine Nail Art Designs 2014 Ideas Images Tutorial Step By Step Flowers Pics Photos Wallpapers
Nail Art Magazine Nail Art Designs 2014 Ideas Images Tutorial Step By Step Flowers Pics Photos Wallpapers

Nail Art Magazine Nail Art Designs 2014 Ideas Images Tutorial Step By Step Flowers Pics Photos Wallpapers

Nail Art Magazine Nail Art Designs 2014 Ideas Images Tutorial Step By Step Flowers Pics Photos Wallpapers

Nail Art Magazine Nail Art Designs 2014 Ideas Images Tutorial Step By Step Flowers Pics Photos Wallpapers

Nail Art Magazine Nail Art Designs 2014 Ideas Images Tutorial Step By Step Flowers Pics Photos Wallpapers

Nail Art Magazine Nail Art Designs 2014 Ideas Images Tutorial Step By Step Flowers Pics Photos Wallpapers

Nail Art Magazine Nail Art Designs 2014 Ideas Images Tutorial Step By Step Flowers Pics Photos Wallpapers

Nail Art Magazine Nail Art Designs 2014 Ideas Images Tutorial Step By Step Flowers Pics Photos Wallpapers

Nail Art Magazine Nail Art Designs 2014 Ideas Images Tutorial Step By Step Flowers Pics Photos Wallpapers

Nail Art Magazine Nail Art Designs 2014 Ideas Images Tutorial Step By Step Flowers Pics Photos Wallpapers

Nail Art Magazine Nail Art Designs 2014 Ideas Images Tutorial Step By Step Flowers Pics Photos Wallpapers
No comments:
Post a Comment