Source(Google.com.pk)
I applied this gorgeous creamy purple polish from Bio Seaweed Gel (BSG) called Star Struck to my nails to take a swatch picture, and I didn’t want to take it off! Star Struck is a very unique shade of dark purple that sometimes appears to be more of a blurple (blue-ish purple). I thought it would work great as a backdrop for a colorful design, and this is what I ended up with.
Floral stamped nails by Chickettes.com - Bio Seaweed Gel Star Struck Stamped with Mundo de Unas and WistoniaI added this floral design over top of BSG UNITY Star Struck using a floral pattern from the Wistonia Wedding Bliss stamping plate. This plate has some really adorable wedding-themed images, which you can see in the image below. If you’re getting married, or know someone that is, this plate would be great for creating some cute shower or wedding nails. I love the little “I DO!” bubble.
I applied the stamps with my XL squishy stamper and a pink stamping polish from Mundo de Unas. I also used the pink polish and a dotting tool to create the dots on my index finger and pinky. I wanted to make the leaves on the floral image green, so I used a small nail art brush and a green Mundo de Unas polish and traced over the stamp. The green might be a little too bright, but it works.
Wistonia Wedding Bliss Stamping PlateAnd here’s the swatch picture that I took of BSG UNITY Star Struck. Isn’t the color lush? I did a full wear test and review on a different Bio Seaweed Gel polish last week.
Nail art inspiration can come from any number of places. This nail art is a literal interpretation of one of the colors that was just released in The Big Chill collection from Gelish & Gelish MINI (see my swatches of the Big Chill Collection here). Snowflakes & Skyscrapers is a medium grey base with purple and gold shimmer, and the name made me think it would make a great backdrop for a skyline. On my first attempt at this design I tried doing some freehand drawings, but my fine line skills just aren’t there yet. Then while I was looking through my stamping plates to find a snowflake design I stumbled upon a skyline image. Score!
Gelish Snowflakes & Skyscrapers literal interpretation by Chickettes.comI started with two coats of Gelish Snowflakes & Skyscrapers as the backdrop. I then stamped a few snowflakes onto my nails using MoYou Festive Collection Plate #6 and Mundo de Unas white stamping polish. I applied a thin layer of Gelish TIO, wiped the tacky layer, and then stamped the skyscrapers using Bundle Monster plate BM-414 and Mundo de Unas black polish. I let the stamping polish dry for a minute before applying another layer of top coat.
Chickettes.com Gelish Snowflake Nail Art
So which one of the two designs would you wear? :)
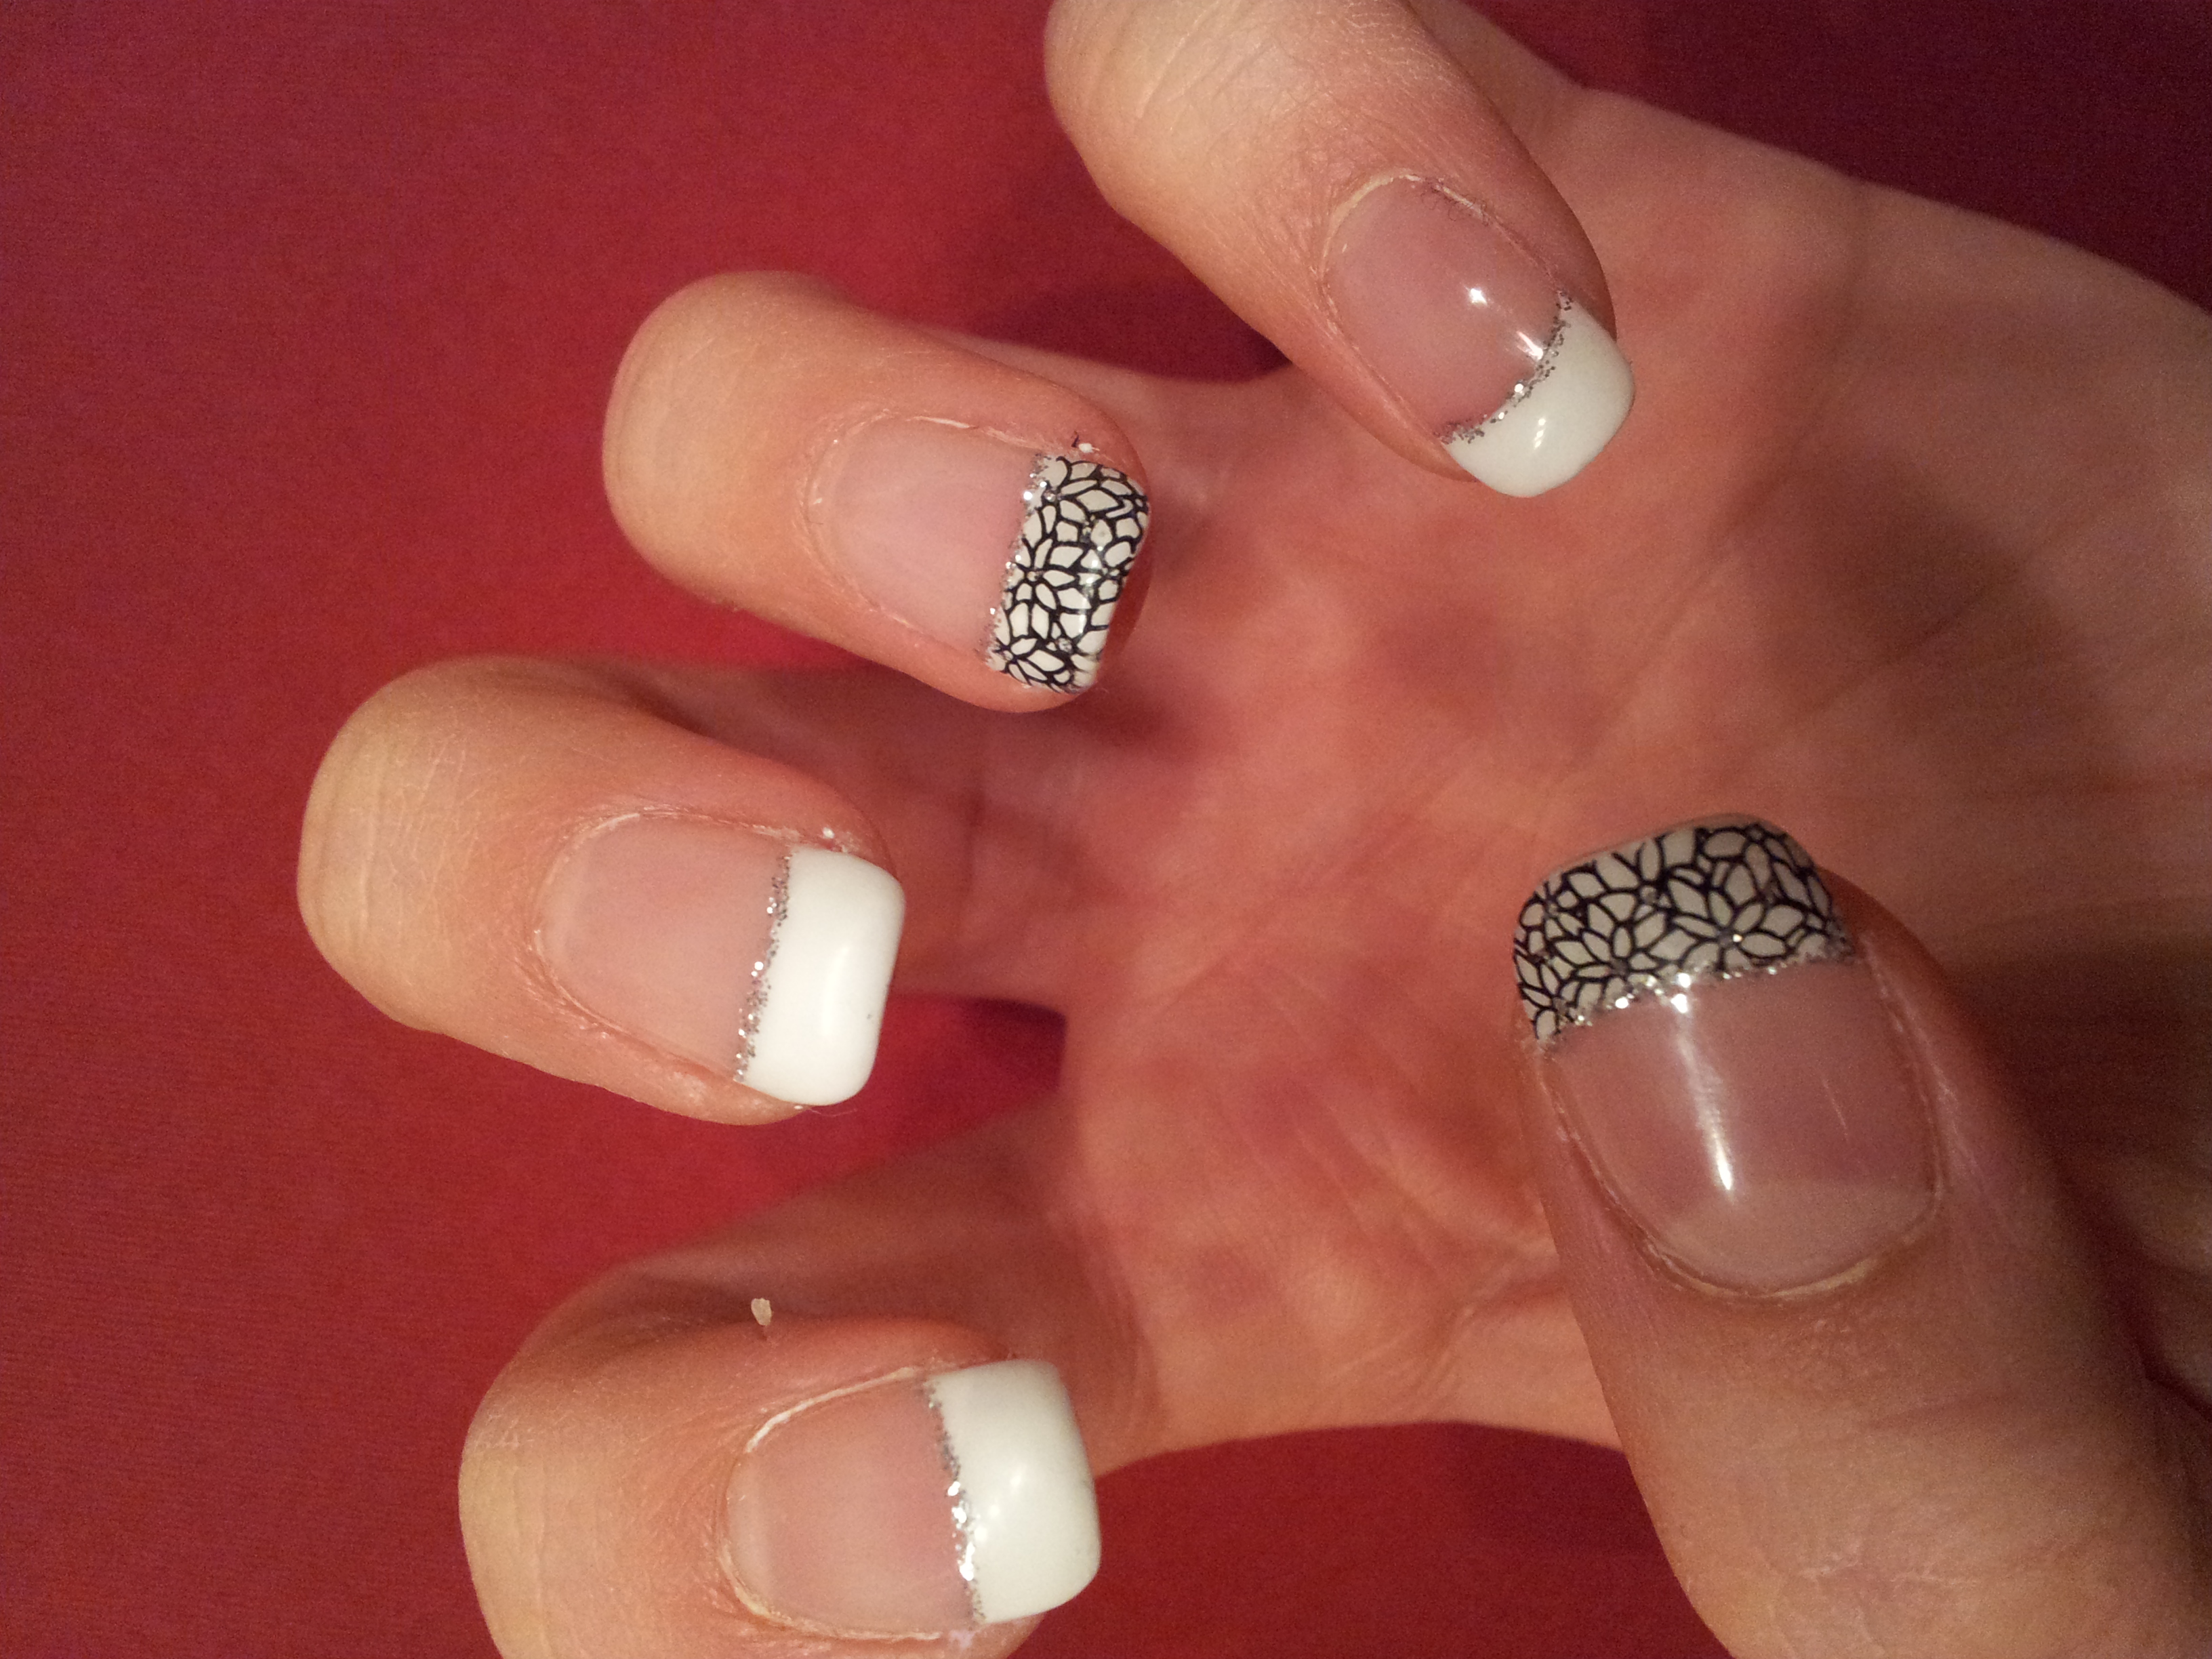
Now that my nails are starting to grow out a little I’m feeling more inspired to do some nail art! Today I went for some neutral shades with some added bling. And I’m happy to say that I finally recorded the gemstone video I’ve been promising forever. It will be posted separately once I’ve had time to edit it… but it’s coming!
Index finger & pinky: These two nails have two coats of Pink Gellac Naked, one of the new shades that was just released. I used my Harmony Gel Striper brush and a silver nail art paint called Presto Chiarezza to add some silver stripes to the nails.
Middle finger: I wanted sheer black under my lace design, so I took a drop of Pink Gellac Beautiful Black and mixed it with some top coat to dilute it. I painted it on with a gel brush and cured. Then I stamped a delicate floral lace pattern onto the nail after wiping the tacky layer off. I used Messy Mansion stamping plate MM44, and black Mundo de Unas stamping polish. Once the stamping polish dried, I applied my gel top coat.
Ring finger: This finger has two coats of Pink Gellac Beautiful Black. When I posted about this color the other day I said it requires three coats, but it was actually nice and opaque with just two coats after I mixed it well. I applied a thick silver stripe down the middle of this nail using the same Presto color gel and a striping brush. Then I applied two rows of clear crystal rhinestones over the stripe, using Gelish Foundation gel as the “glue” and a thick coat of Gelish Top It Off to seal it all in.
I’m really hoping to do some holiday nail art soon, but I haven’t felt inspired yet. It doesn’t feel like the Christmas season to me since I’m not decorating my house this year. I’ll be in sunny Florida for the holiday! Maybe I need to do some beach-themed holiday nails… ?!
Stamping Nail Art Nail Art Designs 2014 Ideas Images Tutorial Step by Step Flowers Pics Photos Wallpapers

Stamping Nail Art Nail Art Designs 2014 Ideas Images Tutorial Step by Step Flowers Pics Photos Wallpapers
Stamping Nail Art Nail Art Designs 2014 Ideas Images Tutorial Step by Step Flowers Pics Photos Wallpapers

Stamping Nail Art Nail Art Designs 2014 Ideas Images Tutorial Step by Step Flowers Pics Photos Wallpapers

Stamping Nail Art Nail Art Designs 2014 Ideas Images Tutorial Step by Step Flowers Pics Photos Wallpapers

Stamping Nail Art Nail Art Designs 2014 Ideas Images Tutorial Step by Step Flowers Pics Photos Wallpapers

Stamping Nail Art Nail Art Designs 2014 Ideas Images Tutorial Step by Step Flowers Pics Photos Wallpapers

Stamping Nail Art Nail Art Designs 2014 Ideas Images Tutorial Step by Step Flowers Pics Photos Wallpapers

Stamping Nail Art Nail Art Designs 2014 Ideas Images Tutorial Step by Step Flowers Pics Photos Wallpapers

Stamping Nail Art Nail Art Designs 2014 Ideas Images Tutorial Step by Step Flowers Pics Photos Wallpapers

Stamping Nail Art Nail Art Designs 2014 Ideas Images Tutorial Step by Step Flowers Pics Photos Wallpapers

Stamping Nail Art Nail Art Designs 2014 Ideas Images Tutorial Step by Step Flowers Pics Photos Wallpapers

Stamping Nail Art Nail Art Designs 2014 Ideas Images Tutorial Step by Step Flowers Pics Photos Wallpapers

Stamping Nail Art Nail Art Designs 2014 Ideas Images Tutorial Step by Step Flowers Pics Photos Wallpapers

Stamping Nail Art Nail Art Designs 2014 Ideas Images Tutorial Step by Step Flowers Pics Photos Wallpapers
No comments:
Post a Comment