Source(Google.com.pk)
1.Alternating nail polish colors on each finger or painting each finger with a different color is sure to grab attention. It is simple and needs very less effort.
2.There are several effect nail polishes available in the market like Crackle effect, Croc effect, Magnetic effect, Colour changing polishes etc. You can easily use them for a quick and a different nail look.
3.There are several ready to use nail art designs available in market like Water decals, Nail stickers and full nail wraps. Instructions for applying these are generally mentioned on them and are quite easy for beginners.
4.It is the easiest and let’s say first step towards free hand nail art design. Dots look simple and elegant. You can start by drawing dots on your nails to make flowers.
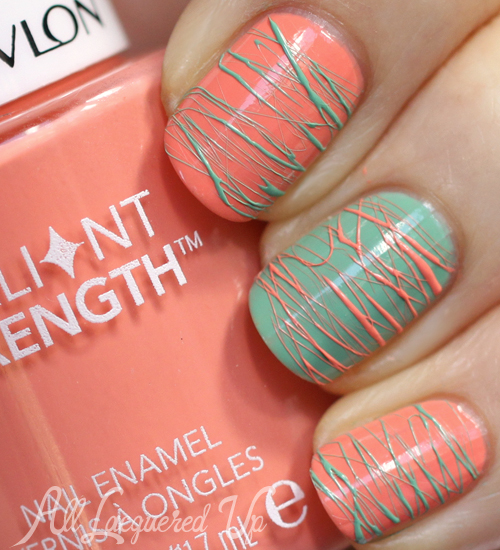
5.Stripes look very attractive on nails. To create stripes, you need a nail art striper pen or you can even create stripes using a thin brush.
6.Flowers can be created by connecting the Dots mentioned above.
7.Animal prints like zebra, leopard are very easy to do and look very cute on your nails.
8.Adding some bling to your nails is very easy. Rhinestones are perfect for a party look.
9.Just use a stick and contrasting colours to get this design. Follow the instructions here for this simple Nail Art design.
10.This nail paint is easier than it looks. Follow the instructions for this newspaper nail art tutorial here.
11.Another simple nail art tutorial that you can get by doing more than one stripes on the nails. Get the details here.
12.You can do this design using Dotting tools and Nail stickers. Another great Nail art design for Parties. Get detailed instructions here.
13.You can get the Caviar Nail art design by using beads and a fast drying top coat.
14.Another nail arts design for beginners, create this Holy Leaf nail art design using Rhinestones and glitter.
15.Use a Nail art brush to create the hat and beard to create this simple Christmas nail art. The rest of the nail paint is very simple.
16.Though Valentine’s Day has just gone by, you can still wear this design for a whole year! Pink is cute no matter what time of the year it is!You can do this nail art design by painting your nails powder pink except ring finger. Paint your ring finger white and put polka dots using toothpick in heart shape. Use different hues of pink for making dots and seal your design with a good top coat and you are done.
17.Bows are very much in trend and they look very pretty on your nails too. To get this look paint your nails blue and add polka dots using toothpick and make rhinestone bow on your ring finger. Stick rhinestones using nail glue. After it dries apply top coat.
18.Doing this look is quite easy and with little patience you can get this right on your nails. For this choose three fast dry nail paints and overlap each color as shown in the picture and allow enough time in between to dry the layers and you are done.
19.Half-moon nail arts always look classy!If you like this look, you can get it by painting your nails black and then adding different colors of rhinestones near the cuticle areas as shown in the picture and apply fast drying top coat.
20.They are very easy to do. All you need is brown chocolate color nail paint and some embellishments like hearts (you can use broken hair clips) and fimo pieces. Stick them using nail glue. Also add golden glitter nail paint on your thumb and pinky.
21.Glitter gradients look very cool! You can get this look by painting your nails black and adding fuchia glitter nail paints using sponge on tips. When it get dries, apply top coat.
22.This looks so classy and chic. If you like this look, you can try this by painting your nails lavender and adding silver glitter using sponge on half-moon area. You can also use dry glitter or glitter eye shadow by mixing it with clear nail paint.
23.You can get this look by making maroon to purple gradient and apply matte topcoat over it, let it dry completely and then add dots of clear nail paint using toothpick at one side of your nail. Don’t apply any top coat on them.
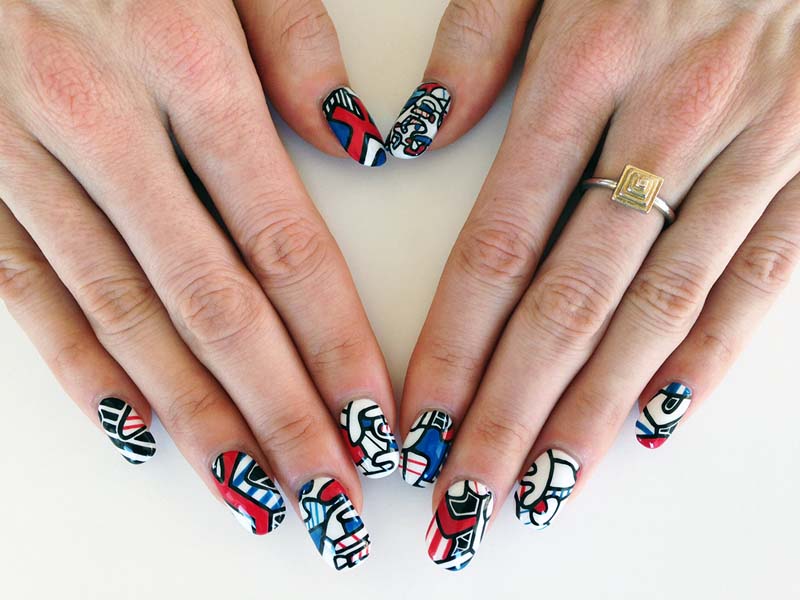
24.These nail paint designs look very cool if done properly. To get this look paint your nails white and let them dry completely, now make black lines using black striper pen and fill some spaces with different colors and leave some spaces white. If needed draw black lines again to give neater look. When it dries completely apply fast drying top coat.
25.Nowadays adding real feather to your nails is in very much trend.For this, paint your nails and put feather on your nail when the polish is still wet and wait for few minutes so that it get set. After that, trim your feather in nails shape and top coat your nails.
26.Having mix and match nails looks very trendy and superb. You can get this look by painting your thumb and middle finger yellow, your pointer finger black with white polka dots and your pinky finger white with black lines as shown and your ring finger in a graphite glitter color. After you finish applying nail paint, apply top coat.
27.These nails can be done by painting your nails in two colors and adding chain and studs on your nails. Also add some animal print on your pointer and pinky finger.
28.To get this look paint your nails with glitter polish and add thin dark colored tips. Don’t forget to seal your nails with good top coat.
29.Glow in the dark nails look chick for night outs. These special nail polishes which glow in the dark come in many colors.
30.To get this nail art design, simply make gradients with different colors on all your nails and stamp your nails with your choice of your design and top coat them.
31.To get nails like these, paint your nails in nude color and add green glitter polish, fimo flower and some rhinestones here and there and you are done.
32.These nails look very pretty and are very easy to do. Just paint your nails in one color and when it is completely dried use cello tape to paint other half and top coat.
33.Heart gardens are also very easy to do. Paint your nails off-white and draw hearts with brown stems and small leaves. Seal your nail design with top coat.
34.Matte and shiny black looks very chick and trendy. Paint your nails with matte black nail polish and add polka dots with shiny top coat.
35.Funky French is also known as two tone French. It looks very cool. Doing this nail paint designs is quite easy. Just do it as you do your normal French but using different colors.
Nail Art Nail Polish Nail Art Designs 2014 Ideas Images Tutorial Step By Step Flowers Pics Photos Wallpapers
Nail Art Nail Polish Nail Art Designs 2014 Ideas Images Tutorial Step By Step Flowers Pics Photos Wallpapers

Nail Art Nail Polish Nail Art Designs 2014 Ideas Images Tutorial Step By Step Flowers Pics Photos Wallpapers

Nail Art Nail Polish Nail Art Designs 2014 Ideas Images Tutorial Step By Step Flowers Pics Photos Wallpapers

Nail Art Nail Polish Nail Art Designs 2014 Ideas Images Tutorial Step By Step Flowers Pics Photos Wallpapers

Nail Art Nail Polish Nail Art Designs 2014 Ideas Images Tutorial Step By Step Flowers Pics Photos Wallpapers

Nail Art Nail Polish Nail Art Designs 2014 Ideas Images Tutorial Step By Step Flowers Pics Photos Wallpapers
Nail Art Nail Polish Nail Art Designs 2014 Ideas Images Tutorial Step By Step Flowers Pics Photos Wallpapers

Nail Art Nail Polish Nail Art Designs 2014 Ideas Images Tutorial Step By Step Flowers Pics Photos Wallpapers

Nail Art Nail Polish Nail Art Designs 2014 Ideas Images Tutorial Step By Step Flowers Pics Photos Wallpapers

Nail Art Nail Polish Nail Art Designs 2014 Ideas Images Tutorial Step By Step Flowers Pics Photos Wallpapers

Nail Art Nail Polish Nail Art Designs 2014 Ideas Images Tutorial Step By Step Flowers Pics Photos Wallpapers

Nail Art Nail Polish Nail Art Designs 2014 Ideas Images Tutorial Step By Step Flowers Pics Photos Wallpapers

Nail Art Nail Polish Nail Art Designs 2014 Ideas Images Tutorial Step By Step Flowers Pics Photos Wallpapers

Nail Art Nail Polish Nail Art Designs 2014 Ideas Images Tutorial Step By Step Flowers Pics Photos Wallpapers
No comments:
Post a Comment