Source(google.com.pk)
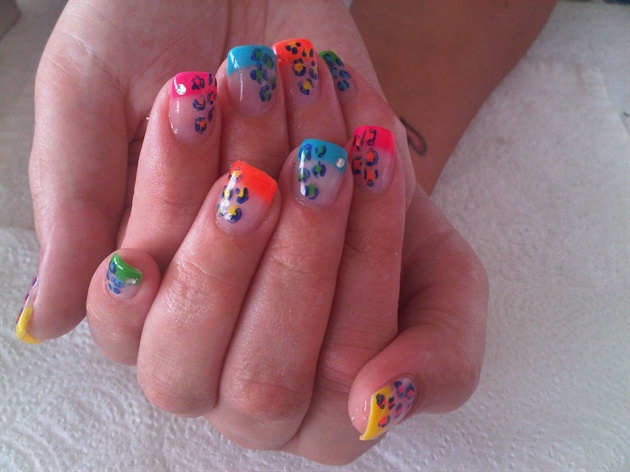
Bio Sculpture Gel is one of the very few gels that can have nail art embedded into the gel and can then be sealed with the gel to protect the nail art, leaving a smooth finish. Gel nail art trends, including snakeskin, feathers and nail studs have proven to be enormously popular and are further enhanced when used alongside Bio Sculpture gel nail designs and nail extensions.
Gels & Tools Used: Base Gel, Hard Gel/ Medium Gel, Colour Gels 123, 126, Gloss Gel, dotting tool
1. On a well prepared nail, apply a layer of Base Gel. Cure.
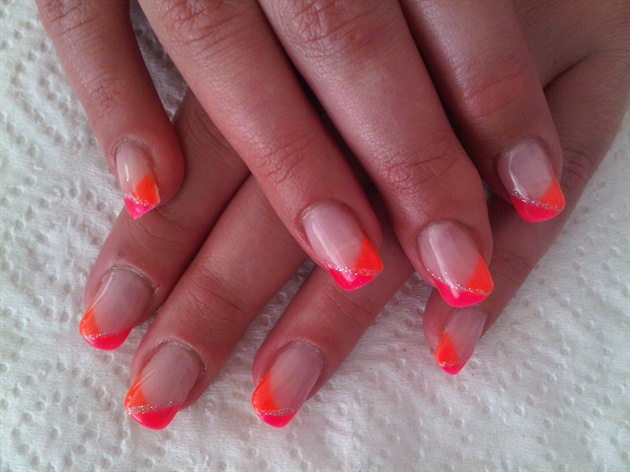
2. Apply Colour Gel #123 Namib Desert to most of nail, leaving a round side for the second color, cure. Repeat.
3. Apply Colour Gel #126 Savannah Dusk to rounded side of nail, cure , repeat.
4. Apply Hard Gel or Medium Gel to entire nail for strength and upper arch, cure.
5. If required clean nail and refine surface with grey buffer, clean nail.
6. Apply Gloss Gel to entire nail- DO NOT CURE.
7. With dotting tool, dot Colour Gel #123 Namib Desert over rounded side, allow to level a few seconds to create the crocodile pattern, cure.
8. Wipe residue from nail to bring out more of the pattern.
9. Apply final finishing layer of Gloss Gel, cure.
10. Wipe final residue with Nail Cleanse.
Gels & Tools Used: Base Gel ,Hard/Medium Gel, Colour Gels #167, 168, Gloss Gel, #17 Deluxe Nail Art Brush
1. On a well prepared nail, apply layer of Base Gel. Cure.
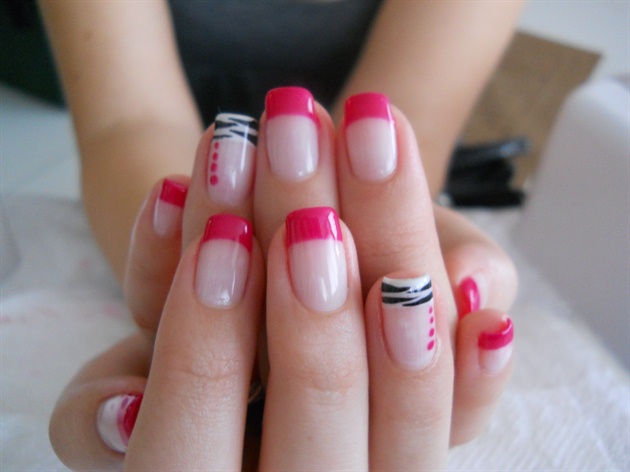
2. Apply colour gel #167 Seductive Lights to nail, cure and repeat.
3. With a #17 Deluxe Nail Art Brush paint squares using colour gel #168 Gilded Reflection. Cure
4. On the top right of each square create a V using colour gel #168 Gilded Reflection. Cure.
5. On top left and bottom right corners of each box paint small lines,. Cure.
6. Create Upper Arch with Hard Gel or Medium Gel. Cure
5. Apply final layer of Gloss Gel. Cure.
6. Wipe sticky residue off with Nail Cleanse.
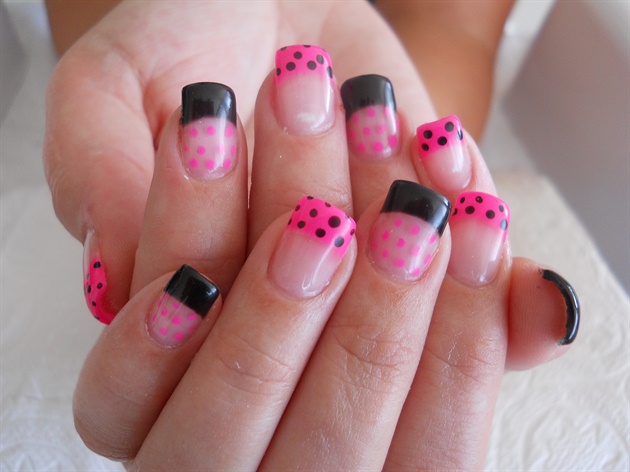
Gels & Tools Used: Base Gel ,Soft Gel, Hard/Medium Gel, Colour Gels #174, 1, 175,138,2017, Gloss Gel, Upper Arch Brush, #17 Deluxe Nail Art Brush, Dotting Tool
1. On a well prepared nail, apply layer of Base Gel, cure.
2. Apply colour gel #174 Samba Your Socks Off to nail, cure and repeat
3. Apply a thin layer of Soft Gel, do not cure
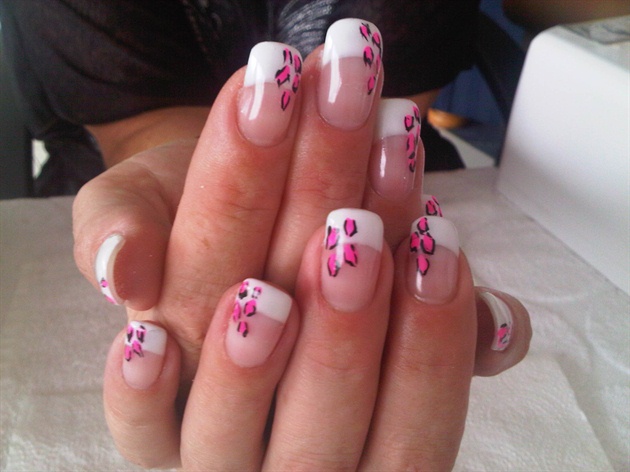
4. Create a circle of 4 big dots using colour gel #1 French White and a Dotting Tool. Add smaller dots of colour gel #175 Havana Nights in each white dot. Do not cure
5. Draw outward strokes from the centre of each white dot, using the tip of the upper arch brush. Cure.
6. Place smaller white dots in between the previously placed dots, completing the circle. Add smaller dots of colour gel #138 Melting Mercury into the centre of each white dot. Do not cure.
7. Draw outward strokes diagonally as in step 5. Cure
8. Place 6 small white dots around the centre of the nail plate, with a smaller dot using colour gel #2017 Liquorice on top of each. Cure.
9. Apply a droplet of Soft Gel to the centre of the nail and place a gem in the centre, cure
10.Create Upper Arch with Hard Gel or Medium Gel. Cure
11.Apply final layer of Gloss Gel. Cure.
12.Wipe sticky residue off with Nail Cleanse.
Gel Nail Art Nail Art Designs 2014 Ideas Images Tutorial Step By Step Flowers Pics Photos Wallpapers
Gel Nail Art Nail Art Designs 2014 Ideas Images Tutorial Step By Step Flowers Pics Photos Wallpapers
Gel Nail Art Nail Art Designs 2014 Ideas Images Tutorial Step By Step Flowers Pics Photos Wallpapers

Gel Nail Art Nail Art Designs 2014 Ideas Images Tutorial Step By Step Flowers Pics Photos Wallpapers
Gel Nail Art Nail Art Designs 2014 Ideas Images Tutorial Step By Step Flowers Pics Photos Wallpapers
Gel Nail Art Nail Art Designs 2014 Ideas Images Tutorial Step By Step Flowers Pics Photos Wallpapers

Gel Nail Art Nail Art Designs 2014 Ideas Images Tutorial Step By Step Flowers Pics Photos Wallpapers

Gel Nail Art Nail Art Designs 2014 Ideas Images Tutorial Step By Step Flowers Pics Photos Wallpapers
Gel Nail Art Nail Art Designs 2014 Ideas Images Tutorial Step By Step Flowers Pics Photos Wallpapers

Gel Nail Art Nail Art Designs 2014 Ideas Images Tutorial Step By Step Flowers Pics Photos Wallpapers

Gel Nail Art Nail Art Designs 2014 Ideas Images Tutorial Step By Step Flowers Pics Photos Wallpapers
Gel Nail Art Nail Art Designs 2014 Ideas Images Tutorial Step By Step Flowers Pics Photos Wallpapers
Gel Nail Art Nail Art Designs 2014 Ideas Images Tutorial Step By Step Flowers Pics Photos Wallpapers

Gel Nail Art Nail Art Designs 2014 Ideas Images Tutorial Step By Step Flowers Pics Photos Wallpapers

Gel Nail Art Nail Art Designs 2014 Ideas Images Tutorial Step By Step Flowers Pics Photos Wallpapers
VLCC Institute Advance Nail Art and Nail Extension Course provides finest level of learning in VLCC Nail Art techniques like 3D Art, Nail Piercing with Jwellery, Upper form with inbuilt design.
ReplyDelete