Source(google.com.pk)
I received two nail foil designs and a non-dry glue from KKCenterHk for review. It's the first time I've used nail foils, so it is by no means perfect, but I will take you through how I applied the foil in this post, along with some handy tips for beginners.
You will need:
- Nail foil transfer
My 5 year-old chose a silver little circle foil and a silver digital square foil - as it turns out, they look similar. The circle foil is more subtle than the square.
- Nail glue
Similar to PVA, the glue turns from milky white to transparent when dry. The dried glue feels sticky on the nail.
- Cotton bud
- Tweezers (optional)
1. Cut foil into pieces big enough to cover your nail.
Prepare one piece per nail or one longer piece for two nails (if you're lazy like me). I won't recommend any more than that as application can get messy. Size-wise, the foil piece should be about 1.5 times wider and longer than your nail for proper coverage.
2. Apply nail glue
Prepare your nail as with a normal manicure (remove cuticle, clean nail surface etc). Apply a thin layer of glue over clean naked nails. You can apply on top of polish but I found no difference in adherence or final finish with the foils I used.
* The key to successful foil application is to let the glue dry completely before putting on foil!
It is crucial to let the glue dry, when it goes from milky to transparent. Drying will take approximately 3-5 minutes depending on humidity and individual chemistry. If you can let it dry for longer, please do.
* Bear in mind that your nail is sticky with the glue on, even when the glue is dried (that's why the foil can stick to the nail). Avoid dust, hair, cat fur or anything that may stick, unless you want a 'textured' foil finish...
The glue I used can be found here.
3. Apply foil with cotton bud
Place the foil on the midline of your sticky nail. Then, using a cotton bud, gently spread the foil to the sides, one side at a time (to minimise creasing). Don't use the end of your tweezers or a hard edge to press the foil down, as it tends to create creases. Finish up by pressing the foil down at the free edge to properly wrap the nail.
4. Lift foil backing from nail starting from the free nail edge
I used tweezers to lift the foil backing away. If the glue is properly dried, the foil will stick well to your nail and the backing will peel off perfectly, leaving a clear hole.
* Depending on the design, you can patch up imperfections by placing unused foil on the bits that didn't pick up the foil.
* Not all polish top coats work well with nail foil (some cause shrinking). I applied piCture pOlish's Revolution as a top coat on one nail as suggested by Cathy of More Nail Polish and found no difference in the finish.
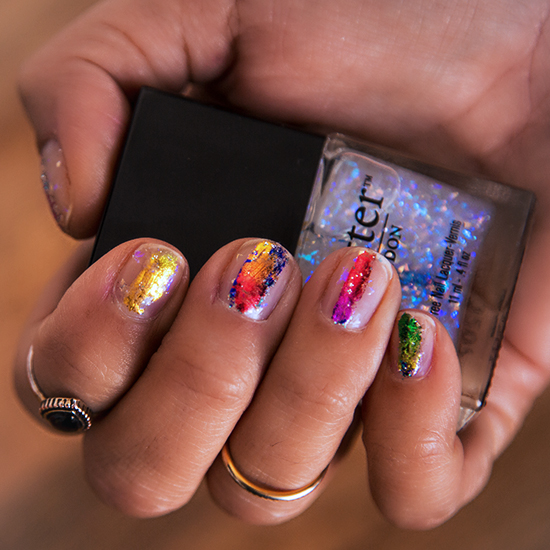
I am puzzled by the ridges in the final finish but they remained, even with ridge-filling basecoat. My guess is that the glue was bit thick both in formula and in my application. Also, I keep staring at the creases and wondering if it is my natural nail curve, or just a matter of practising. Overall, my first nail foil attempt was fun and I see a lot of potential in mixing-and-matching different foil designs, such as for a galaxy manicure.
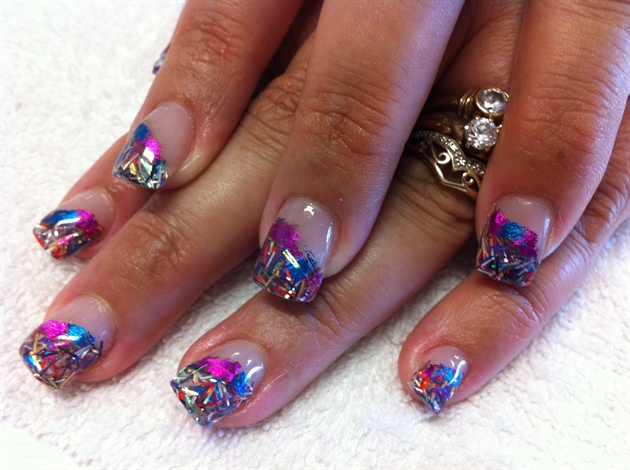
Nail Art Foil Nail Art Designs 2014 Ideas Images Tutorial Step By Step Flowers Pics Photos Wallpapers
Nail Art Foil Nail Art Designs 2014 Ideas Images Tutorial Step By Step Flowers Pics Photos Wallpapers
Nail Art Foil Nail Art Designs 2014 Ideas Images Tutorial Step By Step Flowers Pics Photos Wallpapers

Nail Art Foil Nail Art Designs 2014 Ideas Images Tutorial Step By Step Flowers Pics Photos Wallpapers
Nail Art Foil Nail Art Designs 2014 Ideas Images Tutorial Step By Step Flowers Pics Photos Wallpapers

Nail Art Foil Nail Art Designs 2014 Ideas Images Tutorial Step By Step Flowers Pics Photos Wallpapers

Nail Art Foil Nail Art Designs 2014 Ideas Images Tutorial Step By Step Flowers Pics Photos Wallpapers

Nail Art Foil Nail Art Designs 2014 Ideas Images Tutorial Step By Step Flowers Pics Photos Wallpapers

Nail Art Foil Nail Art Designs 2014 Ideas Images Tutorial Step By Step Flowers Pics Photos Wallpapers

Nail Art Foil Nail Art Designs 2014 Ideas Images Tutorial Step By Step Flowers Pics Photos Wallpapers
Nail Art Foil Nail Art Designs 2014 Ideas Images Tutorial Step By Step Flowers Pics Photos Wallpapers

Nail Art Foil Nail Art Designs 2014 Ideas Images Tutorial Step By Step Flowers Pics Photos Wallpapers

Nail Art Foil Nail Art Designs 2014 Ideas Images Tutorial Step By Step Flowers Pics Photos Wallpapers

Nail Art Foil Nail Art Designs 2014 Ideas Images Tutorial Step By Step Flowers Pics Photos Wallpapers

Nail Art Foil Nail Art Designs 2014 Ideas Images Tutorial Step By Step Flowers Pics Photos Wallpapers
No comments:
Post a Comment