Source(Google.com.pk)
Give your clients the gift of fabulous tips with these holiday nail art designs, created by Erica Nieuwenhuis, director of education at Bio Sculpture Canada. From soft and feminine to sparkly and party-ready these wintry designs are sure to be a hit with your clients.
Fairies & Feathers
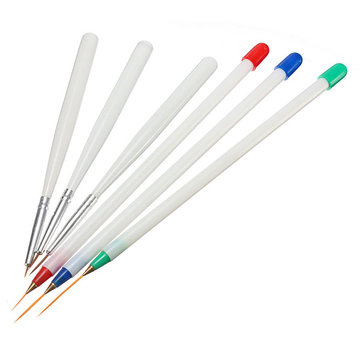
Gels & Tools Used: Base Gel, Soft Gel, Hard/Medium Gel, Gloss Gel, Color Gels #192 Dreams are Forever, # 193 Truth of a Fairy Tale, Fine Gold Glitter Powder, Feathers, #4 Delux Brush Flat #17 Deluxe Nail Art Brush, Tweezers and Stork Scissors.
1. On a prepared nail, apply a layer of Base Gel and cure.
2. Apply a layer of #192 Dreams are Forever to from the free edge to the center of the nail. Do not cure. Apply #193 Truth of a Fairy Tale from the cuticle region to the centre of the nail. Where the two colours meet use a Delux Gel Brush #4 to feather the two colours allowing them to blend. Cure and repeat.
4. Place the feather in the desired position using Bio Sculpture Tweezers. Trim the feather using Bio Sculpture Stork Scissors.
5. Secure the feather with a thin layer of Soft Gel, working from the shaft of the feather outwards and cure.
6. Dip the tip of the #17 Delux Nail Art Brush in Soft Gel, then in Fine Gold Glitter. Apply dots to feather.
7. Dip the tip of the #4 Delux Gel Brush in Soft Gel, then in Fine Gold Glitter. Sparingly apply Glitter to the center of the nail where the two colours meet working from the center outwards in a graded fashion.
8. Create Upper the Arch with Hard or Medium Gel and cure.
9. Apply final layer of Gloss Gel cure.
Marbled Fantasy
Gels & Tools Used: Base Gel, Soft Gel, Hard/Medium Gel, Gloss Gel, Gels #190 Free Imagination, #191 Treasure Chest, #192 Dreams are Forever, Fine Lavender Glitter Powder, #4 Delux Brush Flat #17 Delux Nail Art Brush, Dotting Tool, Tweezers, Clear Stud Gems.
1. On a prepared nail, apply a layer of Base Gel cure.
2. Apply #1 French White to one side of the nail, apply #191 Treasure Chest to the other side. Cure and repeat.
3. Apply a thin layer of Soft Gel only on the white side of the nail. Do not cure.
4. Using a Dotting Tool randomly apply dots of #190 Free Imagination, #191 Treasure Chest, #192 Dreams are Forever. Lightly sprinkle Find Lavender Glitter Powder on the white side of the nail. Using the #17 Delux Nail Art Brush design swirls in the wet Gel creating a marbled effect. Cure.
5. Apply Soft Gel over the entire nail. Do not cure. Place Clear Stud Gems in a line down the centre of the nail and cure.
6. Create Upper the Arch with Hard Medium Gel and cure.
7. Apply final layer of Gloss Gel and cure.
Embossed Swirls
Gels & Tools Used: Base Gel, Soft Gel, Hard/Medium Gel, Gloss Gel, Color Gels #191 Treasure Chest, #2017 Liquorice, #4 Delux Brush Flat #17 Delux Nail Art Brush, Dotting Tool, Tweezers, Silver transfer foil.
1. On a prepared nail, apply a layer of Base Gel cure.
2. Apply #191 Treasure Chest to the nail. Cure and repeat.
3. Apply a thin layer of Soft Gel. Cure. Remove sticky residue with Bio Sculpture Nail Cleanse.
4. Create the swirl design using #2017 Liquorice and the #17 Delux Nail Art Brush. Dab dots using the dotting tool and cure.
5. Cut a piece of silver transfer foil roughly the size of the nail. Press the foil down onto the nail (shiny side facing up). Lift and press again until the desired effect is achieved. The transfer foil should only stick to the swirl design.
6. Create Upper the Arch with Hard or Medium Gel and cure.
7. Apply final layer of Gloss Gel and cure.
Wish Upon a Star
Gels & Tools Used: Base Gel, Soft Gel, Hard/Medium Gel, Gloss Gel, Color Gels #190 Free Imagination, #191 Treasure Chest, #1 French White, #4 Delux Brush Flat #17 Delux Nail Art Brush, Fuchsia, Silver and White A/B Fine Glitter Powder.
1. On a prepared nail, apply a layer of Base Gel and cure.
2. Apply #190 Free Imagination to the nail. Cure and repeat.
3. With #1 French White outline a star and cure.
4. Use #1 French White and #191 Treasure Chest to colour in the star and repeat.
5. Dip the tip of the #4 Delux Gel Brush in Soft Gel, then in Fine White A/B Glitter, apply to parts of star coloured in with #1 French White Gel. Cure. Repeat for #191 Treasure Chest using Fuchsia Glitter and cure.
6. Outline the star with Silver Glitter and cure.
7. Create Upper the Arch with Hard or Medium Gel and cure.
8. Apply final layer of Gloss Gel and cure.
Animal Print
Gels & Tools Used: Base Gel, Soft Gel, Hard/Medium Gel, Gloss Gel, Color Gels #190 Free Imagination, #191 Treasure Chest, #192 Dreams are Forever, #2017 Liquorice, #4 Delux Brush Flat #17 Delux Nail Art Brush, Silver transfer foil.
1. On a prepared nail, apply a layer of Base Gel and cure.
2. Divide the nail in three sections and apply #190 Free Imagination, # 191 Treasure Chest and #192 Dreams are Forever. Before curing, use a #4 Delux Brush Flat to blend the transitions between the three colours. Cure and repeat.
3. Apply a thin layer of Soft Gel. Cure. Remove sticky residue with Nail Cleanse.
4. Apply stripes of #2017 Liquorice with a #17 Nail Art Brush and cure.
5. Cut a piece of silver transfer foil roughly the size of the nail. Press the foil down onto the nail (shiny side facing up). Lift and press again until the desired effect is achieved. The transfer foil should only stick to the black lines.
6. Create Upper the Arch with Hard or Medium Gel and cure.
7. Apply final layer of Gloss Gel and cure.
Nail Art Tools Nail Art Designs 2014 Ideas Images Tutorial Step By Step Flowers Pics Photos Wallpapers

Nail Art Tools Nail Art Designs 2014 Ideas Images Tutorial Step By Step Flowers Pics Photos Wallpapers
Nail Art Tools Nail Art Designs 2014 Ideas Images Tutorial Step By Step Flowers Pics Photos Wallpapers

Nail Art Tools Nail Art Designs 2014 Ideas Images Tutorial Step By Step Flowers Pics Photos Wallpapers

Nail Art Tools Nail Art Designs 2014 Ideas Images Tutorial Step By Step Flowers Pics Photos Wallpapers

Nail Art Tools Nail Art Designs 2014 Ideas Images Tutorial Step By Step Flowers Pics Photos Wallpapers

Nail Art Tools Nail Art Designs 2014 Ideas Images Tutorial Step By Step Flowers Pics Photos Wallpapers
Nail Art Tools Nail Art Designs 2014 Ideas Images Tutorial Step By Step Flowers Pics Photos Wallpapers

Nail Art Tools Nail Art Designs 2014 Ideas Images Tutorial Step By Step Flowers Pics Photos Wallpapers

Nail Art Tools Nail Art Designs 2014 Ideas Images Tutorial Step By Step Flowers Pics Photos Wallpapers

Nail Art Tools Nail Art Designs 2014 Ideas Images Tutorial Step By Step Flowers Pics Photos Wallpapers

Nail Art Tools Nail Art Designs 2014 Ideas Images Tutorial Step By Step Flowers Pics Photos Wallpapers

Nail Art Tools Nail Art Designs 2014 Ideas Images Tutorial Step By Step Flowers Pics Photos Wallpapers
Nail Art Tools Nail Art Designs 2014 Ideas Images Tutorial Step By Step Flowers Pics Photos Wallpapers

Nail Art Tools Nail Art Designs 2014 Ideas Images Tutorial Step By Step Flowers Pics Photos Wallpapers
No comments:
Post a Comment