Source(google.com.pk)
Whether it is a girl’s birthday, her graduation day or the biggest day of her life—her wedding day, she wants to look like a miracle, a beautiful princess of the town, belle of the ballroom, a royal beauty and a perfect epitome of perfection. We are born with the right to look beautiful and any girl seeking such desires is not wrong.
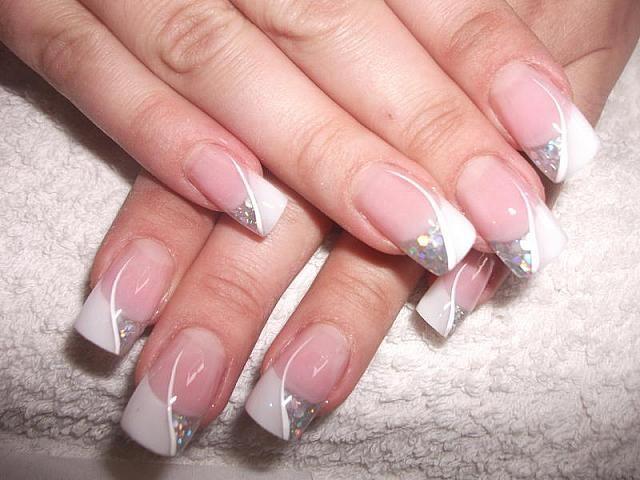
Today I am putting forward easy bridal wedding nail art tutorials of 2014 for girls. I am sure by following few easy and simple steps you can end up having awesome results that look professional coming out of the skilful hands of an expert. Scroll down to look through the tutorials. Apply beads, rhinestones and glitters to give a full touch of beauty to your nails. Cheers!
I applied this gorgeous creamy purple polish from Bio Seaweed Gel (BSG) called Star Struck to my nails to take a swatch picture, and I didn’t want to take it off! Star Struck is a very unique shade of dark purple that sometimes appears to be more of a blurple (blue-ish purple). I thought it would work great as a backdrop for a colorful design, and this is what I ended up with.
Floral stamped nails by Chickettes.com - Bio Seaweed Gel Star Struck Stamped with Mundo de Unas and WistoniaI added this floral design over top of BSG UNITY Star Struck using a floral pattern from the Wistonia Wedding Bliss stamping plate. This plate has some really adorable wedding-themed images, which you can see in the image below. If you’re getting married, or know someone that is, this plate would be great for creating some cute shower or wedding nails. I love the little “I DO!” bubble.
I applied the stamps with my XL squishy stamper and a pink stamping polish from Mundo de Unas. I also used the pink polish and a dotting tool to create the dots on my index finger and pinky. I wanted to make the leaves on the floral image green, so I used a small nail art brush and a green Mundo de Unas polish and traced over the stamp. The green might be a little too bright, but it works.
Wistonia Wedding Bliss Stamping PlateAnd here’s the swatch picture that I took of BSG UNITY Star Struck. Isn’t the color lush? I did a full wear test and review on a different Bio Seaweed Gel polish last week.
We're obsessed with the nail art trend (think: 3D embellishments, chunky glitter and intricate patterns) that's been dominating Pinterest, blogs and celebrity style since early this year. But a detailed, customized manicure can be really pricey. We reached out to Jen, the mind behind blog and Etsy shop Never Too Much Glitter, to create an exclusive nail design that's easy enough to DIY and gorgeous enough to wear on your wedding day.
Materials
Nail polish in a sheer pink or nude base (we used Orly Bare Rose)
Silicone baking cup or small glass or metal cup
Fine glitter in silver or white (we used MAC Reflects Pearl Glitter)
Clear nail polish
Clear-based polish with dense glitter (we used China Glaze Luxe and Lush)
Quick-dry top coat (we used Seche Vite)
Toothpick
Nail polish in your choice of colors for flowers, dots and accents
nail art materials
Step 1: Prep and Paint Nails
Polish nails as usual with your base color.
After it's dry, mix a pea-sized amount of glitter and polish in the silicone cup. It should look sheer and glittery.
Paint the mixture across nails horizontally, going about 1/3 of the way down the nail.
Let dry.
nail art glitter gradation
Step 2: Finish the Gradation
Using your dense glitter polish, paint a horizontal stripe on the top of the nail. It should be half the width of the first glitter stripe.
Add between 1-3 coats, depending on the level of sparkle you prefer. Dry between each coat. Don't worry if it's not perfectly smooth at this stage. A good top coat will even out the bumps and add shine.
If you're not adding any nail art accents, go ahead and apply the top coat.
diy nail art
Step 3: Add Dots and Flowers
Use a toothpick dipped in your choice of nail polish colors (we used white).
Put a couple of drops of nail polish in your silicone baking cup or on a sheet of waxed paper. Dip the toothpick in and touch to the nail. Five dots in a circle make a flower, just be sure to add a contrasting color in the middle for the flower's center.
Option 2: Add a curved, dotted line as an extra embellishment. It's totally up to you!
Step 5: Finish Up
Apply top coat and you're done!
Wedding Nail Art Nail Art Designs 2014 Ideas Images Tutorial Step By Step Flowers Pics Photos Wallpapers

Wedding Nail Art Nail Art Designs 2014 Ideas Images Tutorial Step By Step Flowers Pics Photos Wallpapers

Wedding Nail Art Nail Art Designs 2014 Ideas Images Tutorial Step By Step Flowers Pics Photos Wallpapers

Wedding Nail Art Nail Art Designs 2014 Ideas Images Tutorial Step By Step Flowers Pics Photos Wallpapers

Wedding Nail Art Nail Art Designs 2014 Ideas Images Tutorial Step By Step Flowers Pics Photos Wallpapers

Wedding Nail Art Nail Art Designs 2014 Ideas Images Tutorial Step By Step Flowers Pics Photos Wallpapers

Wedding Nail Art Nail Art Designs 2014 Ideas Images Tutorial Step By Step Flowers Pics Photos Wallpapers

Wedding Nail Art Nail Art Designs 2014 Ideas Images Tutorial Step By Step Flowers Pics Photos Wallpapers

Wedding Nail Art Nail Art Designs 2014 Ideas Images Tutorial Step By Step Flowers Pics Photos Wallpapers

Wedding Nail Art Nail Art Designs 2014 Ideas Images Tutorial Step By Step Flowers Pics Photos Wallpapers

Wedding Nail Art Nail Art Designs 2014 Ideas Images Tutorial Step By Step Flowers Pics Photos Wallpapers
Wedding Nail Art Nail Art Designs 2014 Ideas Images Tutorial Step By Step Flowers Pics Photos Wallpapers
Wedding Nail Art Nail Art Designs 2014 Ideas Images Tutorial Step By Step Flowers Pics Photos Wallpapers
Wedding Nail Art Nail Art Designs 2014 Ideas Images Tutorial Step By Step Flowers Pics Photos Wallpapers

Wedding Nail Art Nail Art Designs 2014 Ideas Images Tutorial Step By Step Flowers Pics Photos Wallpapers
No comments:
Post a Comment