Source(google.com.pk)
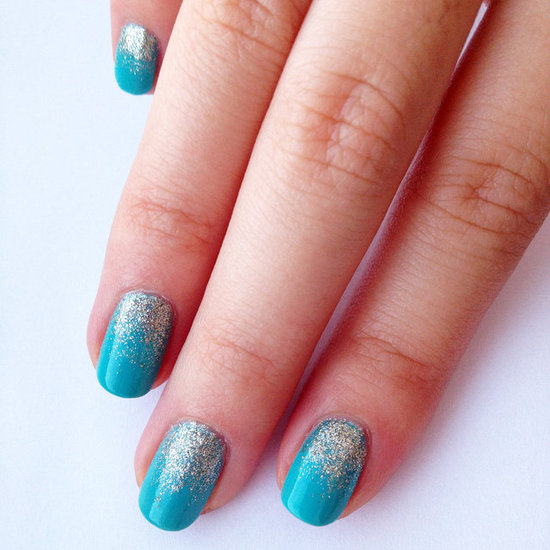
The Glitter Fade is a nail art classic, because it's easy to apply and it just wows, just every time you do it. Now you can apply it with just a glitter that comes in a bottle, but I prefer to hand mix makeup glitter or craft glitter. You can really use any kind of glitter, all glitters are created equal. So what I Iike to do is just dab some out in a plastic dish or in a little piece of tin foil is fine. Then I take a topcoat that will allow my shine to come through, so I usually use a nail art sealer, but you can use any topcoat that you have. I just pour it right next to the glitter, not on top of the glitter. Then I take my brush and I pick up a little bit of topcoat. Then I dab it in a little bit of glitter. This allows me to control the amount I put on, because as I want it to fade, you know I don't want it to be - see how little I can put on? With the amount in a bottle, you're just not sure what's going to come out. Of course, you want to stack it more. Have the glitter come up at the edge and you can do sort of a U-shape to achieve that glitter edge around the top of the nail. The Glitter Fade looks great in every color combination. If you do it in a dark color, like black like the shade we're doing here, it's a really bold look. But in the summer you can end up with a nude or you could do red with red glitter for the holidays or here we're doing it in gold and black for New Years. This is a great, easy, fun nail to complement your New Year's Eve out. What I would also add, the brush I'm using is a makeup brush, but you can really get any brush at a craft store or any small brush. It's just a small square flat-edge brush that I just dab. You can see it's been dabbed quite a bit. You just want to go down the edge of your nail in a U-shape, making sure to seal it with this topcoat. Don't worry if it looks a little lumpy with the glitter. You can just keep smoothing with your brush and then at the end you'll be adding a topcoat. You don't want to be too - you want this to look random. You don't want it to look the same on every nail, because you want it to look like you just dipped your hands in glitter and then it fell. You can even stop here if you'd like. But if you're like me, one isn't enough, you've got to go crazy. So I'm going to add a second kind of glitter. Now this time I'm going to be using the glitter in the brush, because this is just a fantastic glitter. Debra Lynn makes excellent glitters. So I'm going to add it just to the edge, and I'm going to be using so few, that actually taking it out of the bottle is better. But again, this is just a classic shaped glitter you can find at a craft store. So feel free to substitute it and mix it in directly with your topcoat. I just go down the sides of the nail, the tip and the sides just adding a few bigger bolder sparkles. Just to give the look a little extra texture. Glitter on the tips of your nails is great for a woman who works in an industry where she uses her hands a lot, like daycare or food service or anything like that, because it's really glitter will resist water. Water is nail polish's arch-nemesis and just the grit of glitter will protect your polish. So it's crucial that you not only use a base coat, but that you use a topcoat. So right now, I'm just sealing in this look with a topcoat. It's so important to use topcoat and base coat, base coat especially, because it protects your nail from stain and using a color like this black can really stain your nail. So you want to protect your nail, but also help your polish adhere, your manicure will last longer and it makes the color pop.
Glitter is a happy space for most of us – the sight of it brightens an otherwise dull moment.
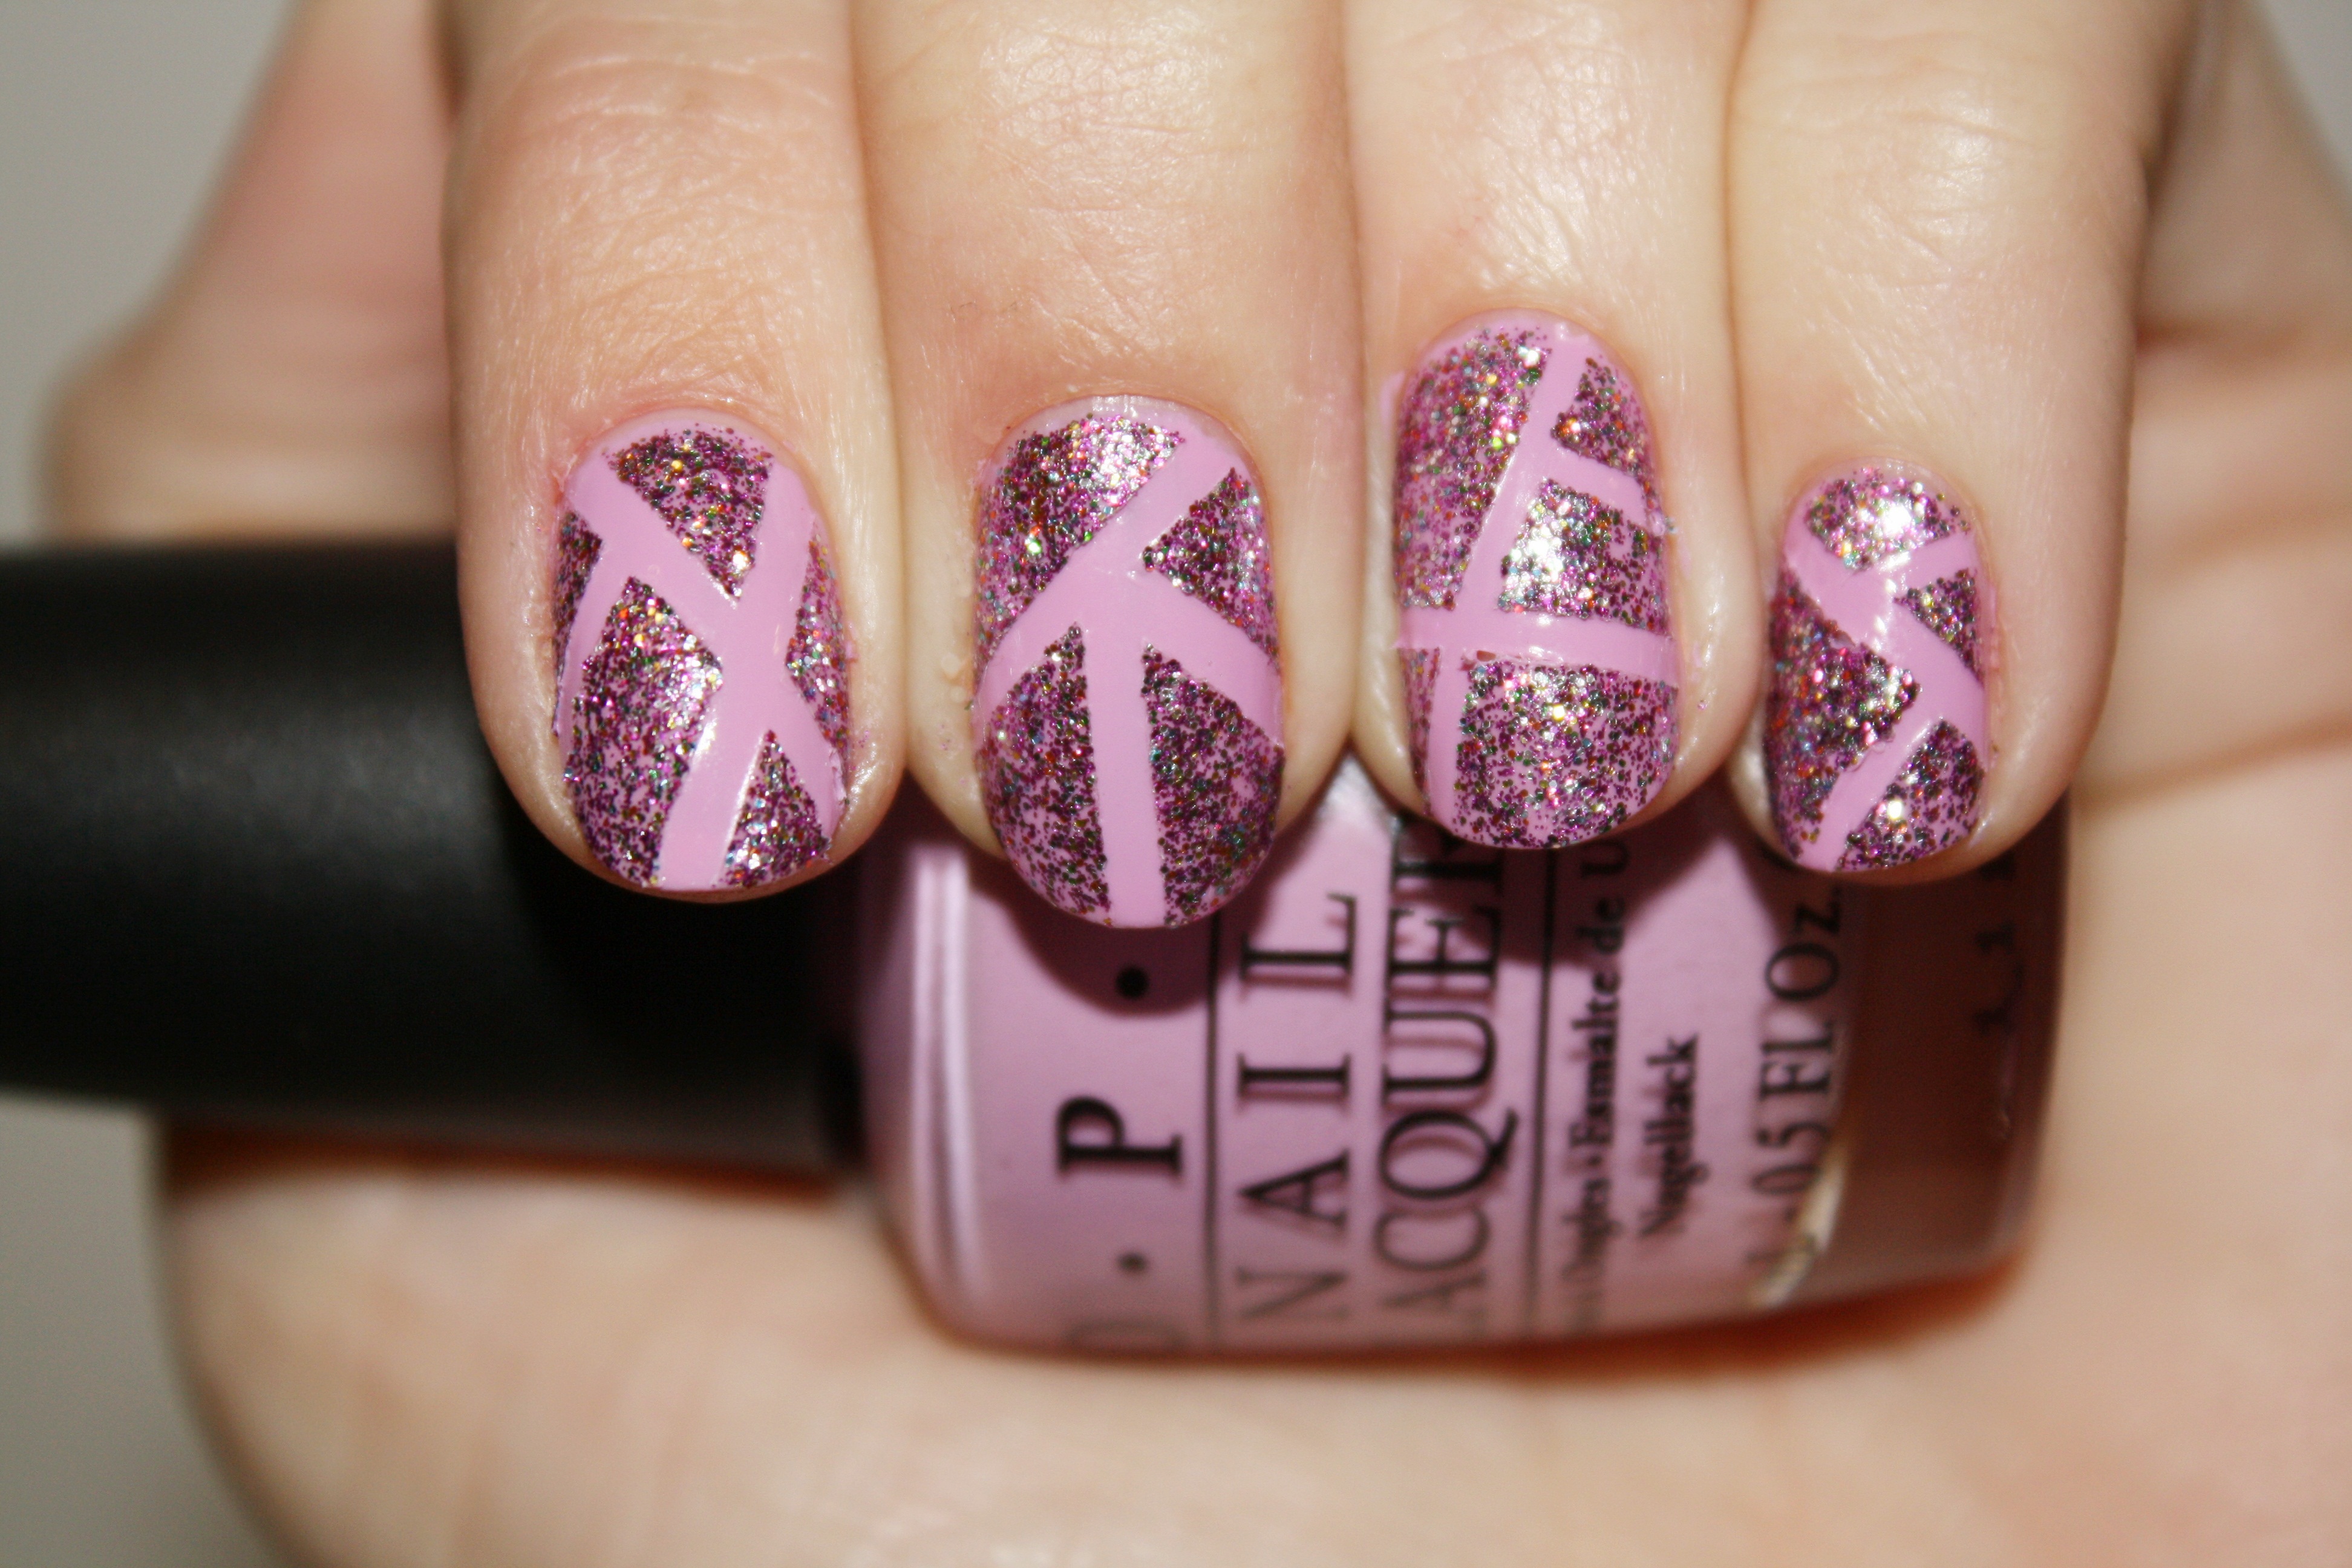
Almost everyone loves glitter on their nails. The easiest way to get nail art with glitter is to apply any nail polish and apply glitter top coat over that. But today I am sharing four other ways to sport simple glitter nail art designs, which are very easy to do. The materials used in these tutorials are easily available and you can get them from your local cosmetics stores.
Glitter Nail Art Ideas:
Tutorial 1: Glitter Tips
Difficulty level: Easy
Drying time: 15-20 minutes
Things needed:
Black nail polish – the more the nail paint, the better the effect. But a shiny finish leads to a glossy finish, so choose as per your needs.
Loose powder glitter (eye shadow glitter pigmentation works too)
Clear nail paint or top coat – this is a very important component. Choose one with top quality.
Base coat – this is essential to preserve the health of nails
1. Apply your basecoat and paint your nails black.
2. Now take your glitter pot (here I am using blue glitter eyeshadow pigmentation).
3. Dip your clear polish brush in your glitter and apply on your nails starting from center of your nails and moving to the tips, allow it dry and apply topcoat.
Nail Art Glitter Nail Art Designs 2014 Ideas Images Tutorial Step By Step Flowers Pics Photos Wallpapers

Nail Art Glitter Nail Art Designs 2014 Ideas Images Tutorial Step By Step Flowers Pics Photos Wallpapers

Nail Art Glitter Nail Art Designs 2014 Ideas Images Tutorial Step By Step Flowers Pics Photos Wallpapers

Nail Art Glitter Nail Art Designs 2014 Ideas Images Tutorial Step By Step Flowers Pics Photos Wallpapers

Nail Art Glitter Nail Art Designs 2014 Ideas Images Tutorial Step By Step Flowers Pics Photos Wallpapers
Nail Art Glitter Nail Art Designs 2014 Ideas Images Tutorial Step By Step Flowers Pics Photos Wallpapers

Nail Art Glitter Nail Art Designs 2014 Ideas Images Tutorial Step By Step Flowers Pics Photos Wallpapers

Nail Art Glitter Nail Art Designs 2014 Ideas Images Tutorial Step By Step Flowers Pics Photos Wallpapers

Nail Art Glitter Nail Art Designs 2014 Ideas Images Tutorial Step By Step Flowers Pics Photos Wallpapers

Nail Art Glitter Nail Art Designs 2014 Ideas Images Tutorial Step By Step Flowers Pics Photos Wallpapers

Nail Art Glitter Nail Art Designs 2014 Ideas Images Tutorial Step By Step Flowers Pics Photos Wallpapers

Nail Art Glitter Nail Art Designs 2014 Ideas Images Tutorial Step By Step Flowers Pics Photos Wallpapers
Nail Art Glitter Nail Art Designs 2014 Ideas Images Tutorial Step By Step Flowers Pics Photos Wallpapers

Nail Art Glitter Nail Art Designs 2014 Ideas Images Tutorial Step By Step Flowers Pics Photos Wallpapers

Nail Art Glitter Nail Art Designs 2014 Ideas Images Tutorial Step By Step Flowers Pics Photos Wallpapers
No comments:
Post a Comment