Source(google.com.pk)
Statement-making nail art designs are today’s must-have fashion accessory and this look created by Bio Sculpture nail artist, Simone Gilbert of Urban Bliss Beauty, is a simple yet effective way to dress up your digits.
This stunning design is inspired by the patterns you find on turquoise gemstone jewellery and can be used on just one feature finger or, if you’re feeling more adventurous, all your nails!
Products used:
• Bio Sculpture Executive Base
• #120 Turquoise Teacup Bio Sculpture nail polish
• #169 The Rebel Bio Sculpture nail polish
• #2017 Licorice Bio Sculpture nail polish
• Glad wrap
• Mug filled with cold water
• Hairspray
• Bio Sculpture High Gloss Top Coat
• Bio Sculpture Acetone Free Nail Polish Remover
• Bio Sculpture Quick Dry Spray
Step 1
Apply a base coat of Executive Base and two coats of 120 Turquoise Teacup and allow to dry.
Step 2
Scrunch a piece of glad wrap up and apply a little #169 The Rebel nail polish to a section and blot on some paper to remove the excess. Very lightly dab the plastic wrap on your nail to create a marbling effect.
Step 3
Take your mug filled with water and place two drops of #2017 Licorice nail polish into the water. The nail polish will spread out and when it does, quickly spray the water with hairspray and watch as it forms an amazing pattern. Dip your finger into the mug to apply the black polish to your nails.
Clean up any polish on the skin using Bio Sculpture Acetone Free Nail Polish Remover.
Step 4
Apply High Gloss Top Coat to finish and a spray of Quick Dry, a fast drying polish spray.
Studs and rhinestones are a fun and easy way to embellish your nails, and are great for beginners and pros alike. Today’s post is going to walk you through what studs and rhinestones are, how to use them, and where to buy them.
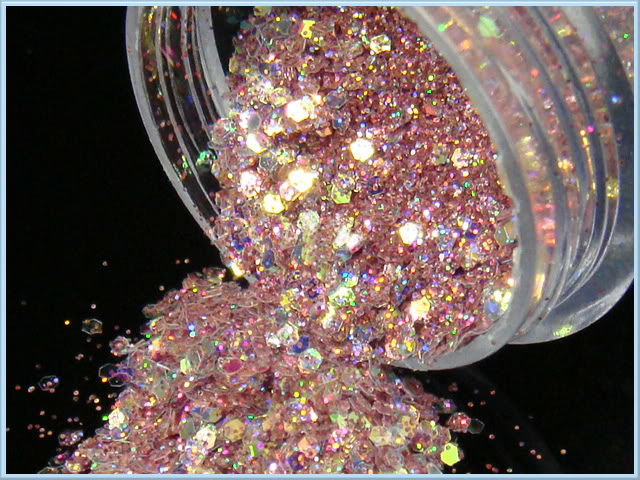
Studs and rhinestones are small 3D shapes with a flat back that are commonly used in nail art. Rhinestones are generally made out of plastic and studs made out of metal. They both come in a variety of different shapes and sizes, ranging from circles and squares, to stars and hearts, and recently some studs have been developed to be holographic or glow in the dark. They often come in a wheel like the ones in the photo below for easy storage.
Step 1. Before you start your mani, be sure to lay your studs/rhinestones out on your workspace so that they’re the right way up. There’s nothing worse than trying to turn them the right way up once your nails are wet!
Step 2. Next you need to decide which method you’re going to use to pick up your studs/rhinestones. There are two common methods for picking up studs and rhinestones and placing them on the nail, these include using tweezers, or a dotting tool dipped in clear polish (read my guide to using dotting tools here). You can also purchase a ‘rhinestone picker’ which is a pencil with a wax based lead that will pick up the rhinestone or stud, but in my experience I’ve found that they leave a white residue from the lead on the stud/rhinestone which isn’t ideal.
Step 3. Paint your nails as you normally would, but don’t apply your top coat yet. Working one nail at a time, apply a clear polish to the nail, and carefully place your studs/rhinestones in place. Make sure the clear polish that you use isn’t fast drying unless you’re prepared to work at lightning speed. If your rhinestones are rather large you may wish to secure them using nail glue, but I’ve found that the majority of studs and rhinestones will hold for around 4 or 5 days just by securing them to a clear polish.
Step 4. Once you’re happy with the placement of your studs/rhinestones, apply a clear top coat to secure them in place. Tada! Mani complete.
Studs and rhinestones can be bought for a few dollars on ebay and from Born Pretty Store. They can also be found in some arts and crafts stores. You can quite often find packs that contain several different sizes and shapes, although keep in mind that often these will contain very large shapes that won’t sit flat on the nail (particularly with studs), so if that’s important to you it might be safer to stick to a pack with a single size/shape to begin with. The colours, shapes, sizes, and finishes of studs and rhinestones are endless, so everyone is bound to find something to suit their style!
Nail Art Accessories Nail Art Designs 2014 Ideas Images Tutorial Step By Step Flowers Pics Photos Wallpapers

Nail Art Accessories Nail Art Designs 2014 Ideas Images Tutorial Step By Step Flowers Pics Photos Wallpapers

Nail Art Accessories Nail Art Designs 2014 Ideas Images Tutorial Step By Step Flowers Pics Photos Wallpapers

Nail Art Accessories Nail Art Designs 2014 Ideas Images Tutorial Step By Step Flowers Pics Photos Wallpapers

Nail Art Accessories Nail Art Designs 2014 Ideas Images Tutorial Step By Step Flowers Pics Photos Wallpapers

Nail Art Accessories Nail Art Designs 2014 Ideas Images Tutorial Step By Step Flowers Pics Photos Wallpapers

Nail Art Accessories Nail Art Designs 2014 Ideas Images Tutorial Step By Step Flowers Pics Photos Wallpapers

Nail Art Accessories Nail Art Designs 2014 Ideas Images Tutorial Step By Step Flowers Pics Photos Wallpapers
Nail Art Accessories Nail Art Designs 2014 Ideas Images Tutorial Step By Step Flowers Pics Photos Wallpapers

Nail Art Accessories Nail Art Designs 2014 Ideas Images Tutorial Step By Step Flowers Pics Photos Wallpapers

Nail Art Accessories Nail Art Designs 2014 Ideas Images Tutorial Step By Step Flowers Pics Photos Wallpapers

Nail Art Accessories Nail Art Designs 2014 Ideas Images Tutorial Step By Step Flowers Pics Photos Wallpapers

Nail Art Accessories Nail Art Designs 2014 Ideas Images Tutorial Step By Step Flowers Pics Photos Wallpapers

Nail Art Accessories Nail Art Designs 2014 Ideas Images Tutorial Step By Step Flowers Pics Photos Wallpapers

Nail Art Accessories Nail Art Designs 2014 Ideas Images Tutorial Step By Step Flowers Pics Photos Wallpapers
Thanks for sharing nice information about nail art accessories with us. i glad to read this post.
ReplyDelete